1. New Project 클릭

2. Maven 선택
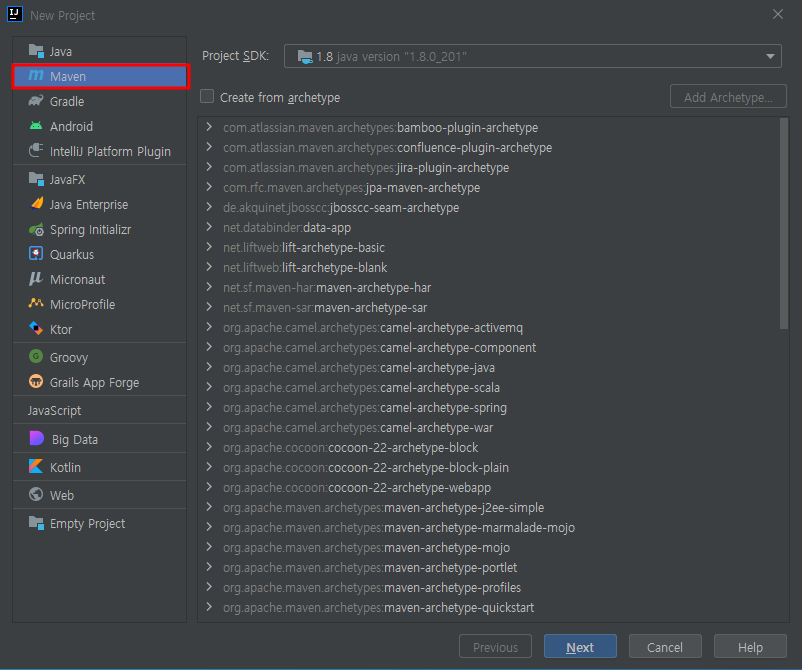
3. Artifact Coordinates를 클릭하여 프로젝트명과 GroupId를 작성한다.

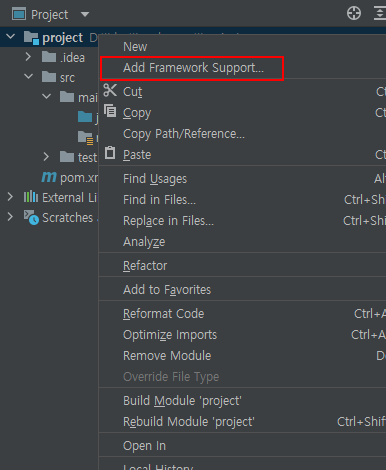
4. project에서 마우스 우클릭하여 Add Framework Support 선택
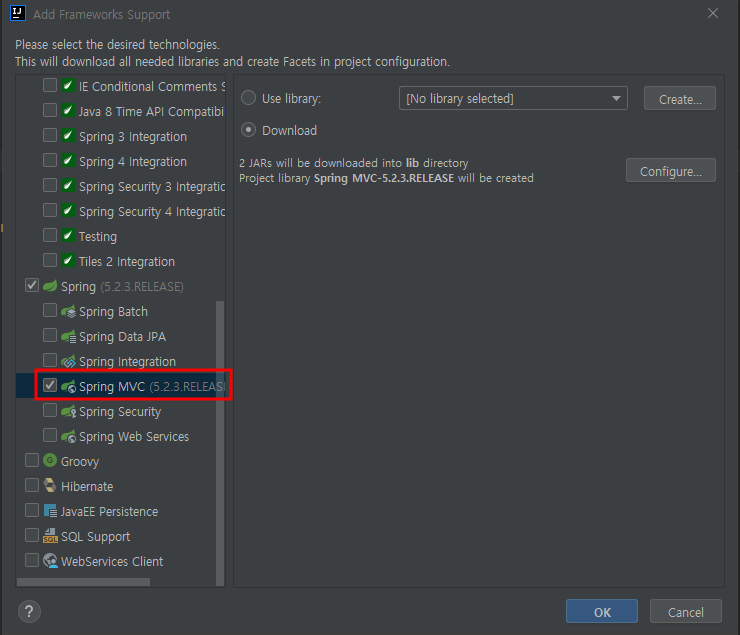
5. Spring MVC 선택
6. pom.xml에서 라이브러리를 관리할 것이기 때문에 lib폴더를 삭제한다

Project Structure [Ctrl+Shift+Alt+s] > Libraries에서 프레임워크를 통해 받아진 라이브러리를 삭제한다.

7. pom.xml에서 springframework 필수적인 의존 라이브러리를 추가 (수정후 우측의 M의 아이콘을 클릭)

<properties>
    <maven.compiler.source>8</maven.compiler.source>
    <maven.compiler.target>8</maven.compiler.target>
    <org.springframework-version>5.2.3.RELEASE</org.springframework-version>
</properties>

<dependencies>
    <dependency>
        <groupId>org.springframework</groupId>
        <artifactId>spring-webmvc</artifactId>
        <version>${org.springframework-version}</version>
    </dependency>
    <dependency>
        <groupId>javax.servlet</groupId>
        <artifactId>javax.servlet-api</artifactId>
        <version>4.0.1</version>
    </dependency>
</dependencies>
8. Project Structure [Ctrl+Shift+Alt+s] > Artifacts > Available Elements 의 내용을 선택하여 마우스 우클릭 후 "Put into /WEB-INF/lib" 선택

9. web 폴더 STS 구조에 맞게 폴더명 변경 및 이동
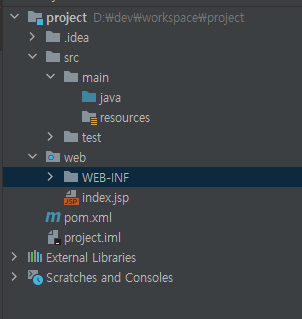 기본구조 |
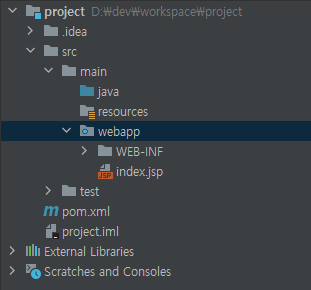 web 폴더 이동 및 변경 |
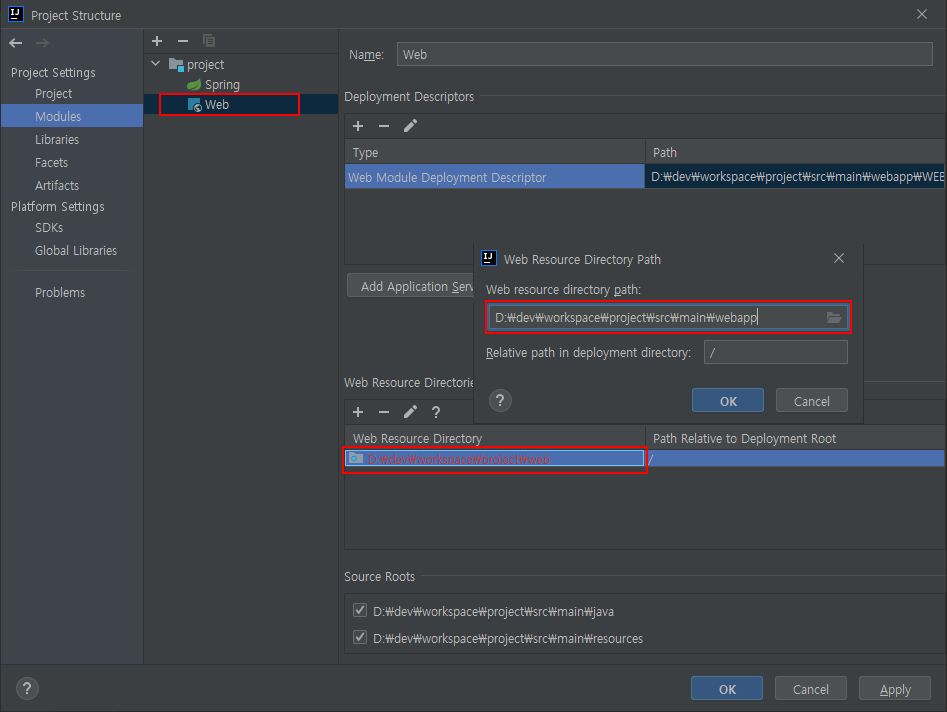
10. web resource 디렉토리 수정
Project Structure [Ctrl+Shift+Alt+s] > Modules > 프로젝트명 > Web 선택
Web Resource Directory 영역 수정
이동된 webapp 폴더 위치로 수정 : D:\dev\workspace\project\src\main\webapp
11. xml 설정
- web.xml
<?xml version="1.0" encoding="UTF-8"?>
<web-app xmlns="http://xmlns.jcp.org/xml/ns/javaee"
         xmlns:xsi="http://www.w3.org/2001/XMLSchema-instance"
         xsi:schemaLocation="http://xmlns.jcp.org/xml/ns/javaee http://xmlns.jcp.org/xml/ns/javaee/web-app_4_0.xsd"
         version="4.0">
    <context-param>
        <param-name>contextConfigLocation</param-name>
        <param-value>/WEB-INF/applicationContext.xml</param-value>
    </context-param>
    <listener>
        <listener-class>org.springframework.web.context.ContextLoaderListener</listener-class>
    </listener>
    <servlet>
        <servlet-name>dispatcher</servlet-name>
        <servlet-class>org.springframework.web.servlet.DispatcherServlet</servlet-class>
        <load-on-startup>1</load-on-startup>
    </servlet>
    <servlet-mapping>
        <servlet-name>dispatcher</servlet-name>
        <url-pattern>*.do</url-pattern>
    </servlet-mapping>
</web-app>- dispatcher-servlet.xml
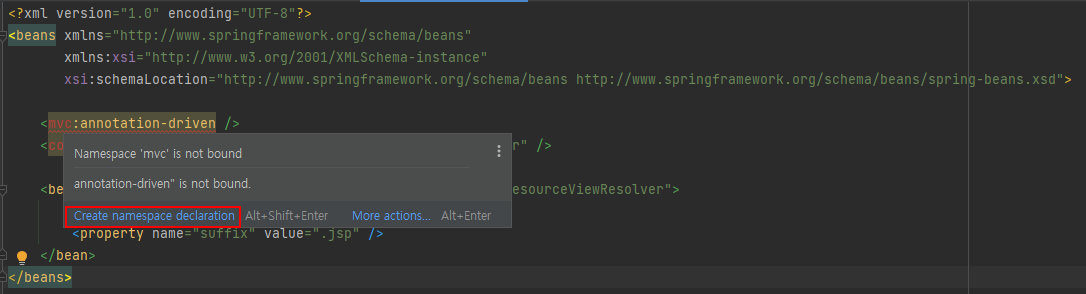
<?xml version="1.0" encoding="UTF-8"?>
<beans xmlns="http://www.springframework.org/schema/beans"
       xmlns:xsi="http://www.w3.org/2001/XMLSchema-instance" xmlns:mvc="http://www.springframework.org/schema/mvc"
       xmlns:context="http://www.springframework.org/schema/context"
       xsi:schemaLocation="http://www.springframework.org/schema/beans http://www.springframework.org/schema/beans/spring-beans.xsd http://www.springframework.org/schema/mvc https://www.springframework.org/schema/mvc/spring-mvc.xsd http://www.springframework.org/schema/context https://www.springframework.org/schema/context/spring-context.xsd">

    <mvc:annotation-driven />
    <context:component-scan base-package="com.jupiter.controller" />

    <bean class="org.springframework.web.servlet.view.InternalResourceViewResolver">
        <property name="prefix" value="/WEB-INF/views/" />
        <property name="suffix" value=".jsp" />
    </bean>

</beans>
인식하지 못하는 namespace가 있다면 Create을 선택
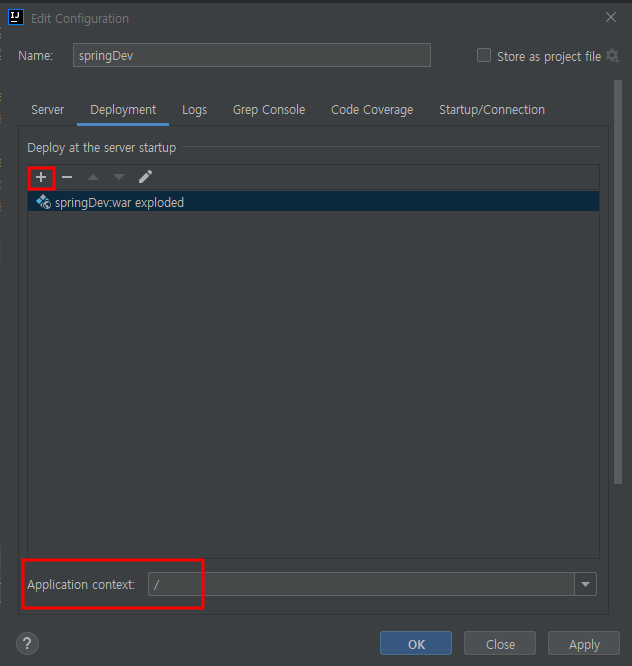
12. tomcat 설정
Add Configuration > Add new > Tomcat Server > Local 선택

Application server : 톰켓 버젼 설정
VM options
(톰켓 로그의 한글이 깨지는 경우 설정 : -Duser.language=en -Duser.region=us)

'java' 카테고리의 다른 글
| ByteBuffer 객체 생성 및 크기 용량 할당 (0) | 2023.08.11 |
|---|---|
| C# > Java UDP Server 인코딩 (0) | 2023.07.17 |
| ajax 404에러 발생하는 경우 (0) | 2022.07.08 |
| curl 코드 변환기(converter) (0) | 2022.06.02 |
| 문자 분할 split 파이프(|) (0) | 2022.05.26 |